Company News
Huawei, OV and others have launched, 3D composite sheet casings explode and demand for automated inspection soars
Date:2018-12-18
Source:Samsun Technology
With the arrival of 5G, the metal back cover of mobiles phoness is near the end of the road, and the back cover of mobiles phoness is made of glass, composite panels and ceramics and other non-metal materials. Glass and ceramic are costly and fragile, with limited scale production and yield, and are only suitable for high-end flagship models, while low-end models are dominated by plastic covers.
A, the rapid development of low-end market at home and abroad, composite plate market is broad
In recent years, Africa, India, Southeast Asia and other low-end models as the mainstream of the emerging overseas markets and the rapid development of the domestic low-end market, cost-effective drive, and the development of plastic texture and material hardening technology, so that the composite plate as a glass-like mobiles phones back cover program quickly replace the metal back cover, occupy the low-end mobiles phones market.
At present, with the advantages of high cost performance, high value, easy processing and fast volume climbing, the composite plate glass imitation process has been adopted by many terminal models, such as Huawei Enjoy 9plus, OPPO A3, Vivo Z1, OPPO realme1, Lenovo K5 PLAY, etc.

Figure The back cover of Huawei Enjoy 9plus features a 3D plate closing arc design with a glass-like texture, image from Huawei's official website
According to industry sources, the market share of plastic shell mobiles phoness may reach 70% in 2019, and the market potential is huge for composite plates as one of the mainstream processes of plastic shells. At present, the composite plate mobiles phones cover processing enterprises are Tongda, Hui Cheng, Wei Bo, Atos, Zhong Chen, San Jing, etc. (hyperlink: 2018 plastic composite plate mobiles phones cover top 20, Lan Si, Hui Cheng, Atos, Victory Precision, etc. are on the list). However, composite plates are facing problems such as limited production capacity and easy deformation of products, and the yield rate has become an obstacle to capacity enhancement.
Second, yield hinders production capacity, automated inspection escort
How to improve the product yield? We have to start from the processing of 3D composite sheet covers for mobiles phoness. From a composite sheet to a mobiles phones 3D curved cover, it mainly includes the following processes.
Design → Screen printing → UV transfer → Plating → Printing → Cutting sheet → High pressure forming → Hardening → Full inspection → CNC fine engraving → Inspection → Packaging etc.
High pressure forming is the key process in the whole laminate processing, mainly including fixing the substrate, heating, pressurising and other processes. This process directly affects the flatness and dimensional accuracy of the product, and is one of the main bottlenecks in the production capacity of the 3D composite cover. High-pressure forming and CNC finishing processes require product inspection to ensure the flatness and dimensional accuracy of the product.
The improvement of 3D composite sheet processing yields cannot be achieved without automated inspection. As a global brand mobiles phones inspection solution provider - Samson Technology, has launched two standard equipment for 3D composite sheet mobiles phones cover height and dimensional inspection.
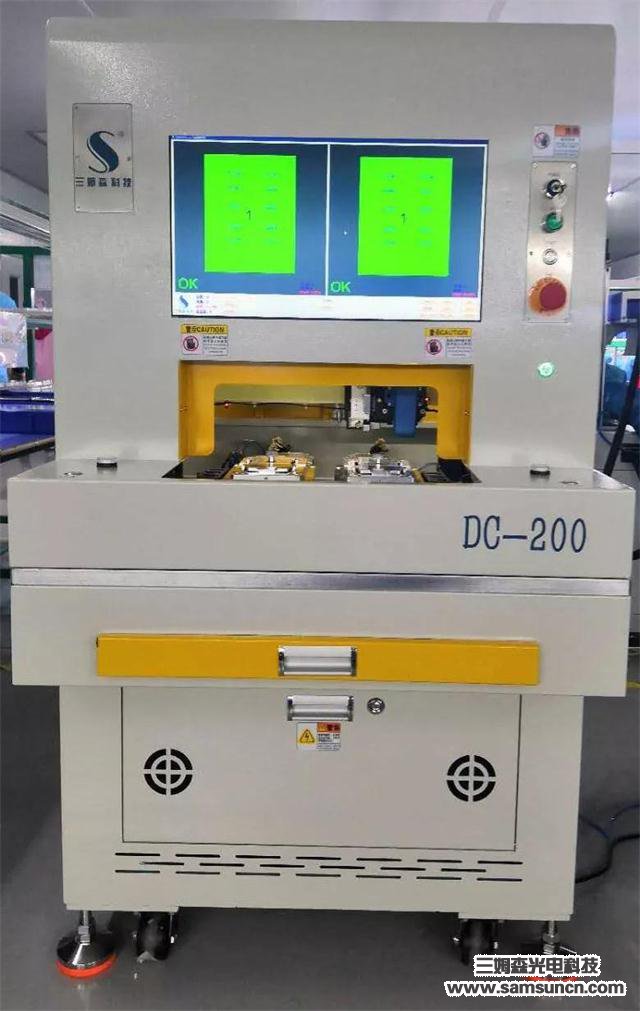
Spectral vision inspection technology - DC-200
The DC-200 uses spectral vision inspection technology, which is the most promising new technology in the field of measurement precision. It integrates the use of electronics, photoelectric detection, image processing and computer use, and introduces machine vision into industrial inspection to achieve rapid measurement of the three-dimensional size or position of an object (product or part), with outstanding advantages such as non-contact, fast speed and good flexibility, in the modern manufacturing industry It has important application prospects in the modern manufacturing industry.
Quality control methods.
Measurement method one (as follows).
1. Measuring the total thickness of the product at points 1 to 6 with a laser, using the surface of the placed product jig as a reference.
2. Using the inner surface of the product as a reference, measure the inner height of the product at points 1 to 6 with a laser.
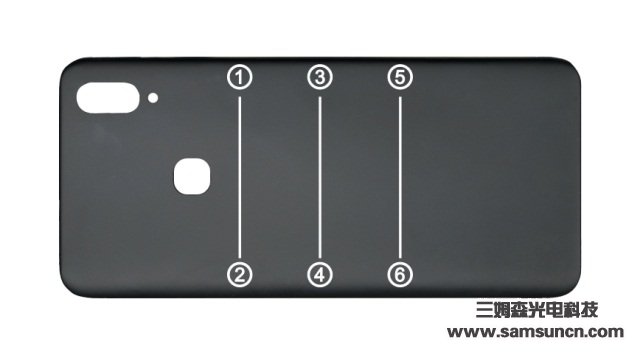
Controllable risk points.
It is possible to effectively control the bulging of the product in the position of the battery cover and the excessive difference in height between the two bevelled edges.
Measurement method two (below).
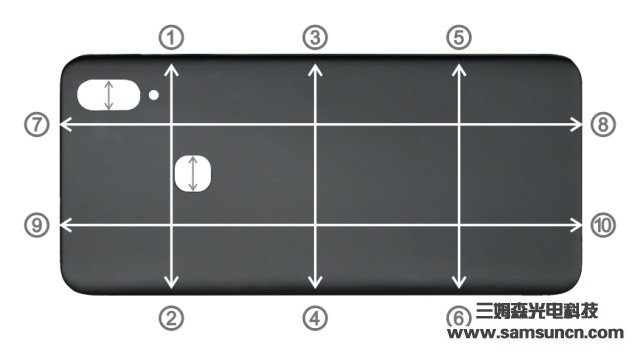
The total thickness of the product is measured by laser at points 1 to 10, using the surface of the tool as a reference.
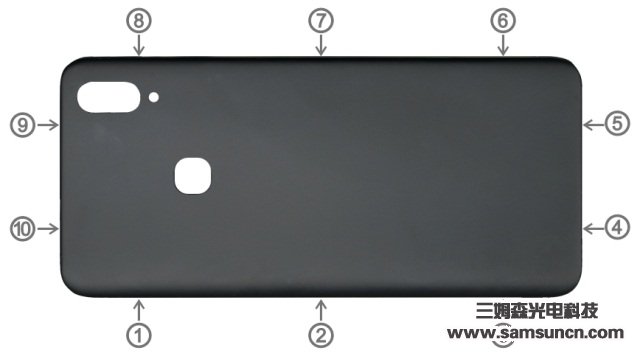
Controllable risk points.
It is possible to effectively control the bulging of the battery cover and the excessive difference in height between the two bevelled edges of the product.
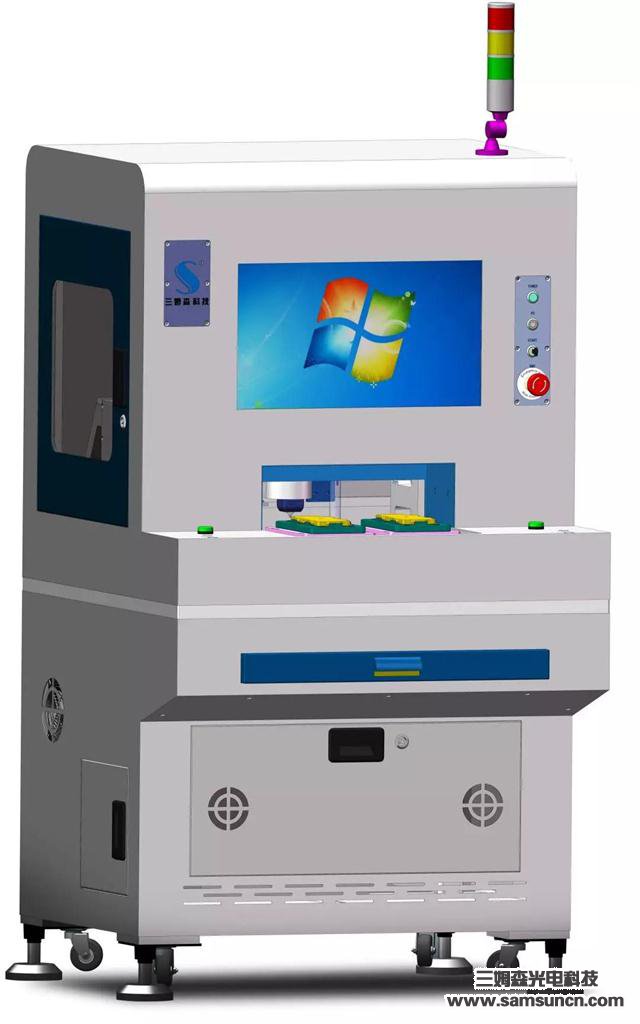
Visual inspection technology - DV-300
he DV-300 uses vision inspection technology, the most promising new technology in the field of measurement precision, which integrates the use of electronics, image processing and computer use, introducing machine vision into industrial inspection to achieve rapid measurement of the size or position of objects (products or parts), with the outstanding advantages of non-contact, speed and flexibility, and has important application prospects in the modern manufacturing industry.
Quality control methods.
Measurement method (below).
CDD measurement of profile length and width, camera / fingerprint hole size position.
Controllable risk points.
Control of product form factor.
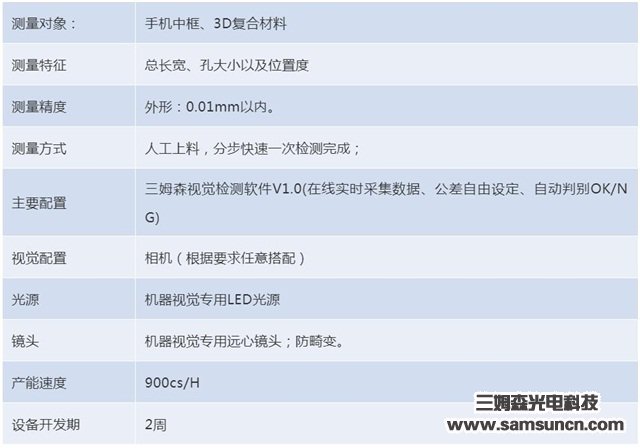
These two machines can be used to measure the external dimensions, total length and width, as well as the camera hole size and heel position of mobiles phones mid-frame and 3D laminate products.
Equipment features.
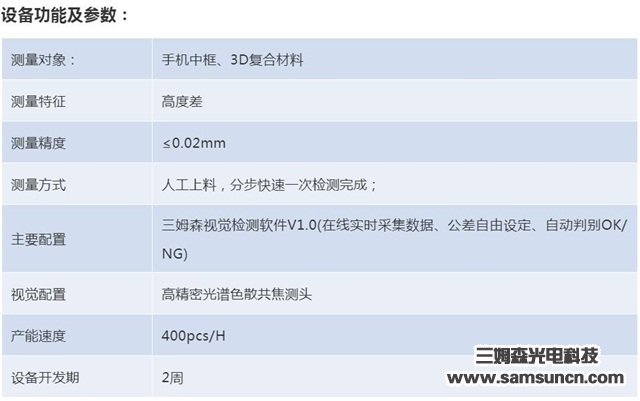
The use of the latest dispersive confocal imaging technology, capable of compatibility with a wide range of materials, ultra-high resolution, low angle, anti-interference and a wide range of measurement.
High precision XYZ motion control system (repeat accuracy 0.01mm), to complete accurate measuring action, with strong versatility.
Ability to measure height and dimensions simultaneously, for multi-faceted product quality control
Advantages.
Efficient, precise and labour-saving.
Automatic inspection, solving staff fatigue during long working hours.
Automatic saving of reports for statistical analysis
Vision inspection software developed in-house from the underlying source code.
One-touch measuring intelligent inspection equipment - CV100
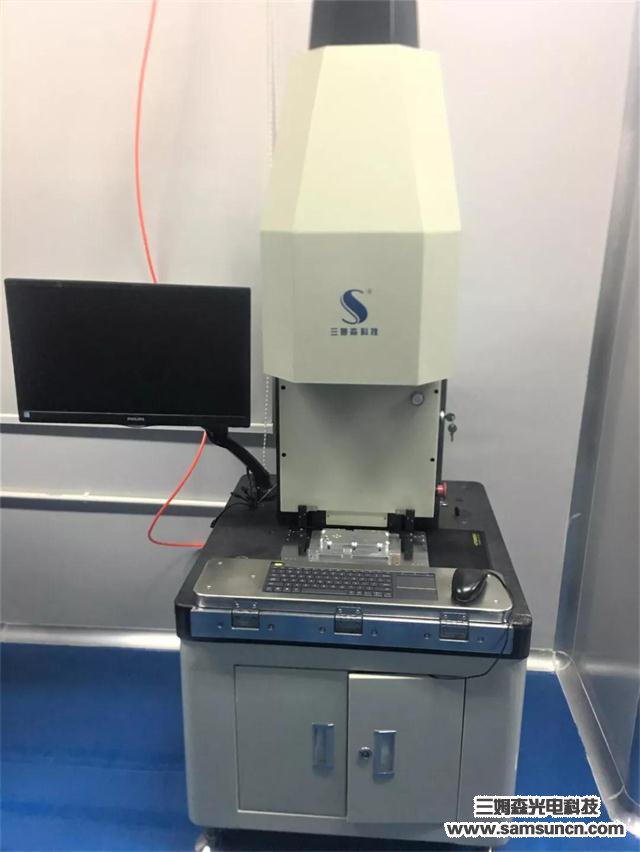
In addition to the two above-mentioned standard equipment for laminate inspection, Samson Technology has also launched a one-touch measuring intelligent inspection equipment - CV100 for mobiles phones glass cover, universal 4.5" to 6.5" mobiles phones glass cover, full-screen form factor and contour size inspection, with a measurement repeatability of 0.005- 0.01mm, with a production speed of 1800PCS/H.
-
Equipment features.
One-touch measurement: large field of view, no need to move the XY coordinate table, software to establish coordinates, one-time measurement, fast.High measurement accuracy: large depth of field telecentric lens ensures no blurring of focus due to segmental aberration, negligible image distortion, repeatable accuracy of 0.005-0.01mm.Easy to learn: the software is independently developed and the image positioning method of measurement is simple and easy to learn.Good generality: similar products can be programmed briefly and then put into use quickly.Easy to operate: after setting up the program just press the measurement button and it will automatically measure the dimensions edited by the program and measure the results quickly.Convenient management: statistical reports can be generated and exported according to customer requirements, facilitating customer management and improving product quality.
Note: Video, pictures and data from Samson Optoelectronics Technology Co.


